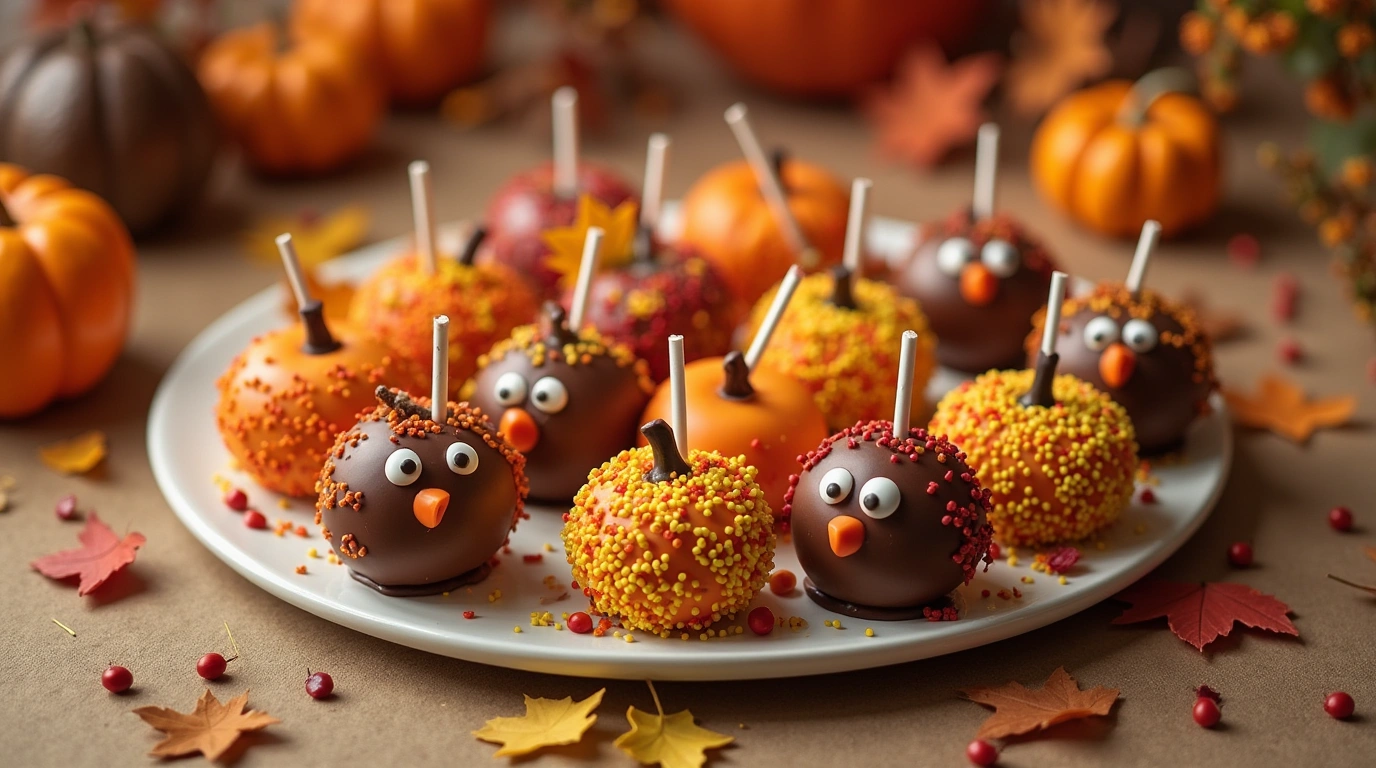
Thanksgiving is a season that invites joy, gratitude, and memorable moments with family and friends. What better way to elevate your holiday celebration than with Thanksgiving cake pops? These bite-sized treats are a fun, versatile, and visually stunning dessert that can serve as a festive centerpiece or a quick grab-and-go option for guests. In this guide, you’ll discover everything you need to know about crafting the perfect cake pops, from design inspiration to practical tips.
Whether you’re a seasoned baker or a kitchen novice, this step-by-step guide will help you create a dessert that everyone will love. Plus, we’ll explore creative turkey cake pops, unique cake pop ideas for Thanksgiving, and troubleshooting tips to ensure your treats are as delightful as the holiday itself.
Table of Contents
Why Thanksgiving Cake Pops Are the Perfect Holiday Treat
Miniature Desserts, Maximum Impact
Thanksgiving cake pops are more than just a sweet bite; they’re a delightful way to add personality to your dessert spread. Their compact size makes them a hit with both kids and adults, and their designs can be customized to reflect the warmth of the holiday season. Picture these: tiny pumpkins, adorable turkeys, and fall leaves, all perched on lollipop sticks. They’re practically edible art!
Ideal for Sharing
When you’re hosting a large Thanksgiving dinner or attending a potluck, desserts that are easy to serve and share become essential. Cake pops are the ultimate grab-and-go dessert. No utensils? No problem. These treats are self-contained, making them perfect for mingling.
How to Make Thanksgiving Cake Pops: A Step-by-Step Guide
Ingredients You’ll Need
Creating these festive delights begins with the right ingredients. Here’s a breakdown of what you’ll need:
| Ingredient | Quantity |
|---|---|
| Pre-baked cake (any flavor) | 1 cake (9×13) |
| Frosting (vanilla, chocolate, or cream cheese) | 1 cup |
| Candy melts in fall colors (orange, brown, yellow) | 2-3 packs |
| Lollipop sticks | 20-25 sticks |
| Edible decorations (sprinkles, candy eyes, etc.) | As needed |
Instructions
Step 1: Prepare the Cake Mixture
- Crumble the baked cake into fine crumbs in a large mixing bowl.
- Add frosting a little at a time, mixing until the texture resembles a sticky dough. Avoid adding too much frosting, as it can make the mixture too soft.
Step 2: Shape the Cake Balls
- Roll the mixture into uniform balls (about 1 inch in diameter).
- Place the balls on a parchment-lined tray and chill them in the fridge for at least 30 minutes.
Step 3: Insert the Sticks
- Melt a small amount of candy melts. Dip the tip of each lollipop stick into the melted candy, then insert it halfway into a cake ball. This helps secure the stick to the ball.
Step 4: Coat and Decorate
- Melt your candy melts in separate bowls according to package instructions.
- Dip each cake pop into the melted candy, ensuring even coverage. Tap gently to remove excess coating.
- Decorate while the coating is still wet. Add sprinkles, edible glitter, or create designs with additional candy melts.
Creative Cake Pop Ideas for Thanksgiving
Turkey Cake Pops
Transform your cake pops into adorable turkeys with a few creative touches:
- Use candy corn to mimic turkey feathers.
- Add candy eyes and a small orange sprinkle for the beak.
- Draw on details like a wattle using red icing.
Pumpkin Cake Pops
For a classic fall look, coat your cake pops in orange candy melts. Add a green candy or frosting stem to complete the pumpkin design.
Fall Leaf Cake Pops
Use a mix of red, orange, and yellow candy melts to create a marbled effect resembling autumn leaves.
Tips for Perfect Cake Pops
- Avoid Cracks: Ensure your cake balls are chilled but not frozen before dipping. Freezing can cause the candy coating to crack as it sets.
- Smooth Coating: For an even finish, tap off excess candy melts gently while rotating the cake pop.
- Secure Sticks: If your sticks keep falling out, add a bit more melted candy before inserting them.
Storing Your Thanksgiving Cake Pops
Store your finished cake pops in an airtight container at room temperature for up to 5 days. If you’re preparing them ahead of time, you can refrigerate them, but allow them to return to room temperature before serving for the best taste.
Frequently Asked Questions (FAQ)
Can I make Thanksgiving cake pops ahead of time?
Yes! You can prepare cake balls up to three days in advance. Coat and decorate them the day before serving for optimal freshness.
What’s the best way to transport cake pops?
Place them in a sturdy box with foam inserts to keep them upright. If foam is unavailable, wrap each individually in plastic and lay them flat.
Can I use white chocolate instead of candy melts?
Absolutely! White chocolate is a great substitute. Add a small amount of vegetable oil for a smoother consistency.
Feedback from Dessert Enthusiasts
- “I made these turkey cake pops for my kids’ school party, and they were a huge hit! Everyone asked for the recipe.”
- “These are so much fun to make! My family loved the pumpkin designs.”
- “Cake pops are my go-to dessert for gatherings. They’re easy, delicious, and look amazing!”
Conclusion: Sweeten Your Thanksgiving with Cake Pops
Thanksgiving cake pops bring creativity, flavor, and fun to your holiday dessert table. From classic pumpkins to whimsical turkeys, these bite-sized treats offer endless possibilities to impress your guests. Plus, with easy customization options and practical serving benefits, they’re the perfect addition to any celebration.
Ready to try your hand at these festive desserts? Share your creations on social media or bring them to your next gathering to spread the joy.
Call-to-Action: Love this guide? Share it with friends or bookmark it for your holiday prep! Let us know how your Thanksgiving cake pops turned out in the comments below.
